Easiest Guide to Export Photos from iPhone to Windows 10 PC
By Joakim Kling - Last Updated: Contact Author
"Apple iPhone could be connected to Microsoft Windows 10 to transfer files now."
As Apple is commonly considered as deadly foe to Microsoft, you may have the question – is it possible to export photos from iPhone to Windows 10 PC – when you are a user of Mircrosoft Windows 10 and Apple iPhone, and need to export iPhone photos to local folder on computer. Take it easy, it is not that difficult to make the two competitors communicate with each other and transfer your iPhone photos if you follow the right way like what are listed below.
1. Export iPhone Photos to PC with DearMob iPhone Manager
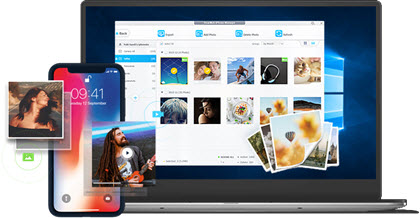
DearMob iPhone Manager is a free yet professional tool to export photos from iPhone to Windows 10 PC one by one or in bulk with just a single click. Whatever photos in your iPhone, Camera Roll photos, Photo Stream, Photo Library photos, etc, this iPhone photo export tool eats them all.
• One-click transfer numerous iPhone photos to computer or another iPhone (iOS 17 and older versions are supported).
• Preserve photo metadata including Geotag information, EXIF, timestamp.
• 8 seconds to transfer 100 4K/HDR/HEIC/Apple ProRAW/live photos in original quality.
• Batch-delete unwanted iPhone photos.
How to Export iPhone Photos to PC with DearMob iPhone Manager?
Step 1. Free Download DearMob iPhone Photo Export Tool
Click the download button on this page to free download DearMob iPhone photo transfer Windows 10 step-up, double-click the .exe set-up and follow the guide to install this tool on your Windows 10 PC.
Step 2. Connect iPhone to Windows 10 PC with USB Cable
When you launch this iPhone photo to Windows 10 transfer tool, you are asked to plugin in your iPhone to your computer with Apple iPhone USB cable. Once connected, you may be required to "Trust this computer" to continue.
Step 3. Export Pictures from iPhone to Windows 10
When the connection of your iPhone and PC is done, you will access to the Photo Transfer interface. Choose certain or multiple pictures on iPhone you want to export, and then click "Export" icon to auto import photos from iPhone to Windows 10 PC.
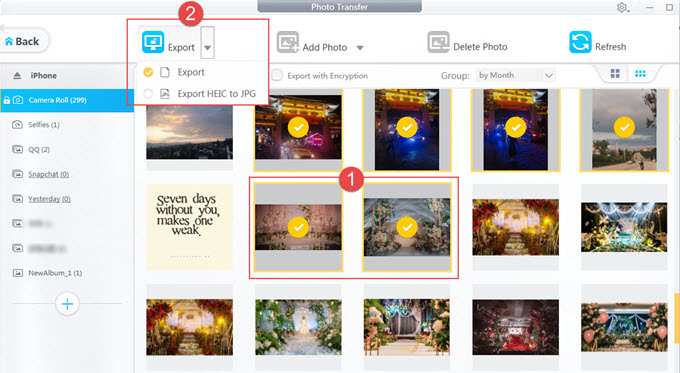
If you are using iOS 11 iPhone 7 or newer, you can convert HEIC to JPG to open on various platforms.
 Note:
Note:
• Before exporting, you can choose the specific folder to save your exported iPhone photos by clicking the Settings on the top right corner.
• Please remember this transferring process is also available for iPad to Windows 10, and DearMob iPhone Manager also allows you to transfer photos from PC to iPhone.
• If you have such problems as Windows photo viewer not recognizing iPhone photos and that you're going with an iPhone 15/14/13/12/11/X/8/7 Plus/7, which adopted Apple's latest HEIC image compressing standard, chances are that you'll need one of the best HEIC converters.
2. Export Photos from iPhone to Windows 10 Using Windows 10 Photos App
Windows 10 Photos app is a native function for only-photo transfer that you can import photos from iPhone to Windows 10 PC in bulk.
Pros: Transfer photos in bulk.
Cons: Requires iTunes | Not able to load all photos of iPhone and export photos from PC to iPhone.
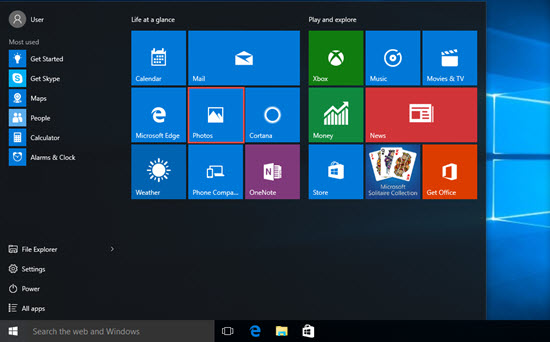
Step 1. Install iTunes on your Windows 10 PC first as iTunes is the essential element to make sure that your Windows 10 computer can get in touch with Apple iPhone.
Step 2. Connect your iPhone to Windows 10 PC over the iPhone USB cable.
Step 3. Open Photos app from the desktop, Start menu or taskbar.
Step 4. Click the button at the top right corner of the Photos app to import. The button looks like a box with an download arrow.
Step 5. Select your iPhone > uncheck iPhone photos you'd like to not export > click Continue to import photos from iPhone to Windows 10.
3. Export Pictures from iPhone to PC through Windows 10 File Explorer
File Explorer is a built-in function of Windows PC with which you can access, copy, move or delete files on phones. When referring to iPhone photos to Windows 10 transfer, it is lucky that iPhone doesn't allow you to access anything but your photos through File Explorer.
Pros: No additional apps needed.
Cons: It fails to read all photos of iPhone.
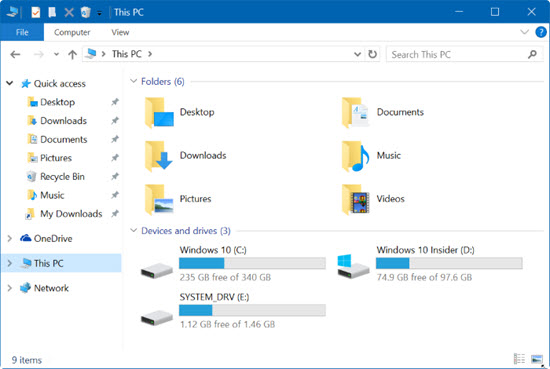
Step 1. Use original Apple USB cable to connect your iPhone to Windows 10 PC, then a notification with a Trust option will appear on your iPhone screen, just choose Trust option to continue.
Step 2. Press the Start key on your keyboard or just click the Star button on your PC to search File Explorer to open.
Step 3. Under This PC, you will see your iPhone as a drive. Double-click the icon for your iPhone here. You will also need to open Internal Storage > DCIM, then another folder inside to get access to your photos.
Step 4. Photos and videos taken on your iPhone should now be visible. Then you can select the photos to transfer them to Windows 10.
4. Export iPhone Photos to Windows 10 PC with iCloud
Though Apple would prefer if you use a Mac alongside your iPhone to export photos, it is still feasible to export pictures from iPhone to Windows 10 PC if you use iCloud. iCloud is supplied by Apple for iPhone users to backup files and personal data termly especially iPhone photos, and it has Windows version happily. You can download iCloud for Windows app to download iPhone photos to Windows 10 or just go to iCloud.com to get them. Just remember to upload photos on your iPhone to iCloud before downloading.
Pros:
• No need for USB cable.
• Photos deleted from iPhone will also get deleted from iCloud, leaving you no chance to regret.
Cons:
• Need WiFi and valid Apple ID to upload iPhone photos.
• Only 5GB free storage space, and you have to pay to the upgraded version for more space. Sometimes iCloud photo library not uploading problem happens.
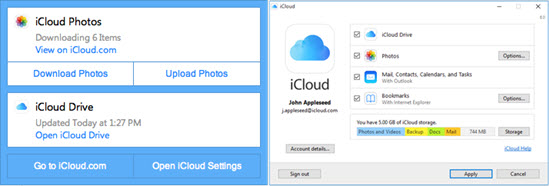
Export iPhone Photos to PC from iCloud Windows app
Step 1. Free download iCloud for Windows set-up on Apple official site, install and run it on your Windows 10 PC.
Step 2. Use your Apple ID to login iCloud for Windows.
Step 3. When you access to iCloud user interface, check the box next to Photos and then click Options to check Download new photos and videos to my PC > click Done > click Apply. The photos you upload from iPhone will all sync to your computer automatically, and you can check them in your local folder.

Export iPhone Pictures to PC from iCloud.com
Step 1. Open iCloud.com and enter your personal account and code on computer.
Step 2. On the mian UI, click Photos button in your iCloud. A window with all photos you upload shows up, choose one or several photos you like to download and then click the download arrow on the top right of iCloud Photos. Now the photos on your iPhone have been downloaded on your computer, you can find them in your Downloads folder.
5. Import Photos from iPhone to Windows 10 with Phone Companion App
Phone Companion is a Windows 10's new function that helps people export photos from iPhone to Windows 10 PC in bulk.
Pros: Blanket import.
Cons: Can't selectively choose certain photos to export at your disposal.
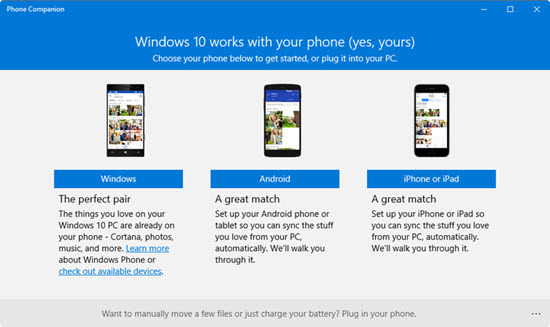
Step 1. Plug your iPhone into your Windows 10 PC with the USB cable, and the Phone Companion will launch with a screen showing some Microsoft apps and services as well as some information about your iPhone.
Step 2. Click Import Photos and Videos into the Photos app.
Step 3. When the Photos app for Windows 10 opens, you'll see the message showing how many photos and videos on your iPhone. By default this iPhone photo export tool will export all your iPhone photos and videos to the Pictures file on your computer.
Wrap Up
To sum up, each iPhone photo export tool has its strengths and shortcomings. If you want to have clear view of the internal structure in your iPhone, or if you want to freely select certain pictures to transfer and if you want to export photos from iPhone to Windows 10 as many as possible without space limitation, you are highly recommended to use DearMob iPhone Manager.


