Though well-received in its early years, iTunes was discontinued by Apple service in 2019 after tasting a years-long debate. Notably, the security vulnerabilities and software bloat issues that iTunes has been repeatedly accused of have begun pressuring people to resort to other solutions to transfer, backup, and organize their multimedia. Among them, one that has been continuously asked is how to transfer photos from PC to iPhone without iTunes. Worry not, in this post, we will illustrate how to transfer photos from PC to iPhone without iTunes through the top 6 ways.
Transfer Photos from PC to iPhone with DearMob iPhone Manager
Built with the same operating principle to transfer photos to iPhone from PC, DearMob iPhone Manager serves as the best iTunes alternative that deserts all the unfriendly facets of iTunes, presenting to you the easiest solution ever to transfer HEIC/PNG/JPG/live/HDR photos, images, pictures on iiPhone 15/14/13/12/11/X, etc. and PC back and forth. 100% free, no data loss, and no restriction to file formats. Besides, it empowers you to transfer videos from PC to iPhone, back up and restore files on iPhone, etc. Down below is how to transfer photos from PC to iPhone without iTunes:
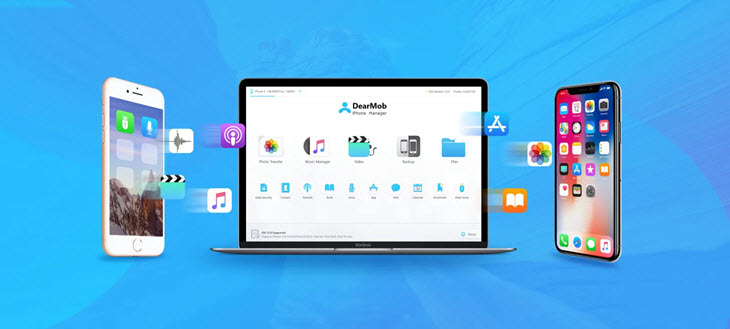
Step 1. Free download DearMob onto your PC, and launch it. Connect to your iOS device with USB cable.
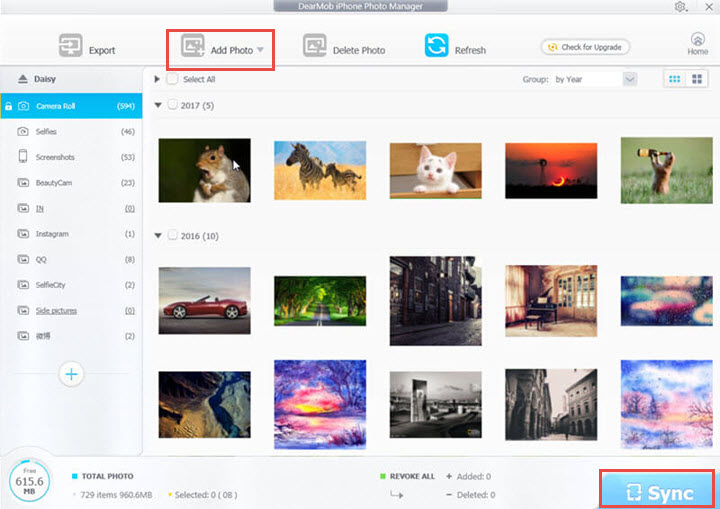
Step 2. Go to the Photo Transfer, click Add Photos, and select the photos you want to transfer to your iPhone.

Step 3. Click the Sync button to transfer photos from PC to iPhone without iTunes.
The steps to send photos to iPhone via a Mac works similarly, you can check detailed steps here.
Transfer Photos from PC to iPhone with iCloud Photos
As a part of Apple's iCloud suite of services, iCloud Photos enables you to store and sync all your photo and video libraries with the original resolution and metadata retained. This way, you can access your photos on any device supported by iCloud using the same Apple ID. But note that if the photos that you wish to transfer is larger than 5 GB, a subscription fee is required for extra storage or the service would cease to upload your file. To transfer photos from PC to iPhone without iTunes:

Step 1. Go to iCloud.com on your web browser, log in with your Apple ID. Click the Photos icon.
Step 2. Navigate to the Upload button at the top right, click it and in the new window that pops up, browse through and select the photos you wish to add to your iPhone.
Step 3. Then, click on Open to upload the photos to your iCloud Photo library. The progress bar at the bottom could inform how many items are left to be uploaded.
Once the upload is finished, go to the Photos app on your iPhone (make sure the iCloud feature is enabled and the Wi-Fi stays connected), and you could soon find all your photo items uploaded there.
Transfer Photos from PC to iPhone with Google Photos
Designed as a cloud-based sharing platform, Google Photos lands another option for you to transfer photos to iPhone without iTunes. All you need is to upload the photos you wish to add to your iPhone to the storage service. But note that the photos you back up in High quality or Express quality will count toward your 15 GB of free Google Account storage, and for any additional storage, a purchase is required to upgrade to a Google One member. How to transfer photos to iPhone from PC via Google Photos:

Step 1. Log on to Google Photos on the PC, hit Upload > Computer option to upload the photos you wish to transfer to the cloud.
Step 2. Download and run the Google Photos on your iPhone, sign in to the app with the same account that you use on your PC.
Step 3. Head to the Photos, and you could access and view all your photos that you transfer from your PC.
Transfer Photos from PC to iPhone with Dropbox
Running as a file hosting service for people to host and archive their digital files and photos, Dropbox is a reliable iTunes alternative when it comes to transferring photos from PC to iPhone. With minimal compression trace on the image after uploading, you can rest assured the quality of the photos loaded on your iPhone remains the same. Note that the Dropbox basic users are given only 2GB of free storage space, and to unlock more storage limits, a purchase must be made. To transfer photos to iPhone from PC with Dropbox:

Step 1. Log on to Dropbox on the PC, and on the home page, tap the Upload files to upload the photos you wish to download to iPhone. This will sync your photos to the Dropbox cloud.
Step 2. Open Dropbox app on your iPhone, and you could then see all photos uploaded. To save them to your iPhone photo library, tap the three dots at the upper right corner > Save to device.
Transfer Photos from PC to iPhone with Email
Featuring the ability to carry multimedia, Email is another direct way to transfer photos from PC to iPhone without iTunes. But thing is that email file size limits remain unimaginably low as Gmail holds a file capacity of up to only 25MB for attachments in a single email and others are even less. Thus if your photos come in a large size, this old-school way might not be the preferred option.

Step 1. Log in your email account your computer. Compose a new email, add the photos that you wish to transfer to your iPhone.
Step 2. Input the same email address in the addressee box (or enter a different email address that you own), and click send.
Step 3. Go to your iPhone, sign in to your email address, the one that you put in your addressee box. Check the inbox and locate the email that comes with the photos attachment. Download the photos to save them to your iPhone.
Transfer Photos from PC to iPhone via AirDrop (Mac Only)
If you are running a Mac operating system, the AirDrop feature introduced by Apple makes the whole thing much simpler. Utilizing close-range wireless communication, AirDrop allows for unlimited transfer on file size. And you can send large photos from Mac to iPhone instantly without iTunes. But before you dig into the detail, make sure the Wi-Fi network stays connected and the AirDrop function is turned on. Note that the AirDrop solution is inaccessible for non-Mac users
Step 1. In the Photos app on your Mac, select the photos you wish to share.
Step 2. Click the Share button > AirDrop
Step 3. In the window that pops up showing the nearby AirDrop users, click your iPhone > Done. And your photos will be sent to your iPhone directly.
How to Transfer Photos from PC to iPhone with iTunes
Step 1. Connect your iPhone to PC with Apple original USB cable (The original one will prevent sudden disconnection.), and then run iTunes.
Step 2. Create a folder to contain the photos you want to transfer on you PC.
Step 3. Click Device > select Photos > check Sync Photos > choose the folder you just created > click Apply to start to transfer photos from computer to iPhone.
Bottom Line
Overall, if you want to evade the worrying troubles delivered by iTunes but are trying to work out an easy and limit-free way to transfer photos from PC to iPhone, DearMob iPhone Manager is suggested here.
